Google Chrome アドオン 作成 日記
※参考資料
Google Chrome Hello worldの作り方 アドオン機能を開発者向けに解禁
ここ↓閲覧しながら進めることにします。
http://code.google.com/chrome/extensions/index.html
開いたら・・・
引用 ——————-
How do I start?
1.Follow the Getting Started tutorial
2.Read the Overview
3.Keep up-to-date by reading the Chromium blog
4.Subscribe to the chromium-extensions group
とあるので
まずは Getting Started tutorial
http://code.google.com/chrome/extensions/getstarted.html
「Create and load an extension」の章を見てやってみる(全編英語なのが辛いけどがむばる)
1.Create a folder somewhere on your computer to contain your extension’s code.
要するにどこでもいいからフォルダ作れってことね。
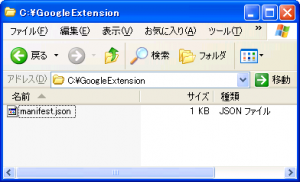
はい作成。
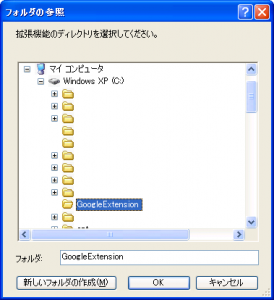
「GoogleExtension」フォルダをc:\に作りました。
2.Inside your extension’s folder, create a text file called manifest.json, and put this in it:
{
“name”: “My First Extension”,
“version”: “1.0”,
“description”: “The first extension that I made.”,
“browser_action”: {
“default_icon”: “icon.png”
},
“permissions”: [
“http://api.flickr.com/”
]
}
作ったフォルダに「manifest.json」って名前で上記のコード記述しろって言ってるよね。
3.Copy this icon to the same folder:
Download icon.png
同じフォルダにicon.pngをダウンロードしろって言ってるのでダウンロードします。
4.Load the extension.
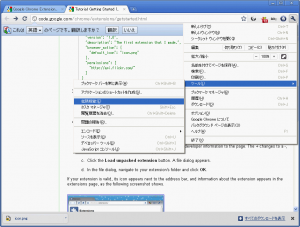
a.Bring up the extensions management page by clicking the wrench icon and choosing Tools > Extensions.
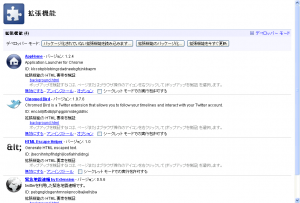
b.If Developer mode has a + by it, click the + to add developer information to the page. The + changes to a -, and more buttons and information appear.
c.Click the Load unpacked extension button. A file dialog appears.
d.In the file dialog, navigate to your extension’s folder and click OK.
a.レンチのアイコンをクリックして Tools → Extensions 開く(日本語だとツール→拡張機能)
b.デベロッパーモードが「+」だったらクリックして・・・
c.「パッケージ化されていない拡張機能を読み込みます…」ボタンをクリック。
d.ファイル選択ダイアログでさっき作ったフォルダを指定して「OK」ボタンをクリックする。
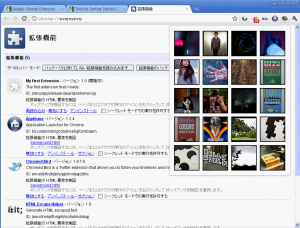
If your extension is valid, its icon appears next to the address bar, and information about the extension appears in the extensions page, as the following screenshot shows.
まぁ、問題なかったらアイコンがアドレスバーの横に表示されて、拡張機能の情報が拡張機能のページに表示されます。次のスクリーンショットのように。
(結構直訳すみません。)
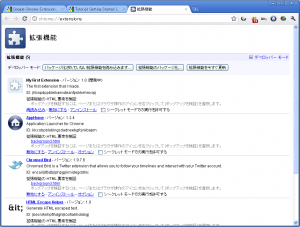
これは問題なかったんだろう・・・
それで次が本題だろう・・・
「Add code to the extension」に入ります。
In this step, you’ll make your extension do something besides just look good.
1.Edit manifest.json to add the following line:
…
“browser_action”: {
“default_icon”: “icon.png”,
“popup”: “popup.html”
},
…
「manifest.json」にこの行を追加する・・・
※現在「manifest.json」はこんなソース
{
“name”: “My First Extension”,
“version”: “1.0”,
“description”: “The first extension that I made.”,
“browser_action”: {
“default_icon”: “icon.png”
},
“permissions”: [
“http://api.flickr.com/”
],
“browser_action”: {
“default_icon”: “icon.png”,
“popup”: “popup.html”
}
}
2.Inside your extension’s folder, create a text file called popup.html, and add the following code to it:
同じフォルダに「popup.html」っていう名前のファイルを作って
「CSS and JavaScript code for hello_world」をクリックして得たコードをコピペ
2.Return to the extensions management page, and click the Reload button to load the new version of the extension.
拡張機能のページに戻って、リロードボタンを押し機能拡張の「再読込する」ボタンを押す。
3.Click the extension’s icon. A popup should appear that displays the contents of popup.html.
その後、アドレスバー横の機能拡張アイコンを押すと「popup.html」のコンテンツが表示される・・・
It should look something like this:
If you don’t see the popup, try the instructions again, following them exactly. Don’t try loading an HTML file that isn’t in the extension’s folder – it won’t work!
Google翻訳で翻訳:あなたはポップアップを表示されない場合は、正確にそれらに続いて、作業手順をもう一度試してください。それは動作しません-拡張機能のフォルダにないHTMLファイルをロードしないでください!
・・・というわけで「Now What?」は現在どうですか?的な感じなので省略します。
「The hosting page, which tells you about options for distributing your extension」
という項目の「hosting」のリンク先に配布方法らしきものが・・・
これは後日・・・





参考になりました!ホームページ制作 池袋
参考になりました!